Wreath-Making Mastery: Step-by-Step Instructions for Crafting Stunning Wreaths
Wreaths are fun, versatile decorations that can be customized for any occasion or season. Making your own wreath allows you to infuse your personal style and originality into your creation.
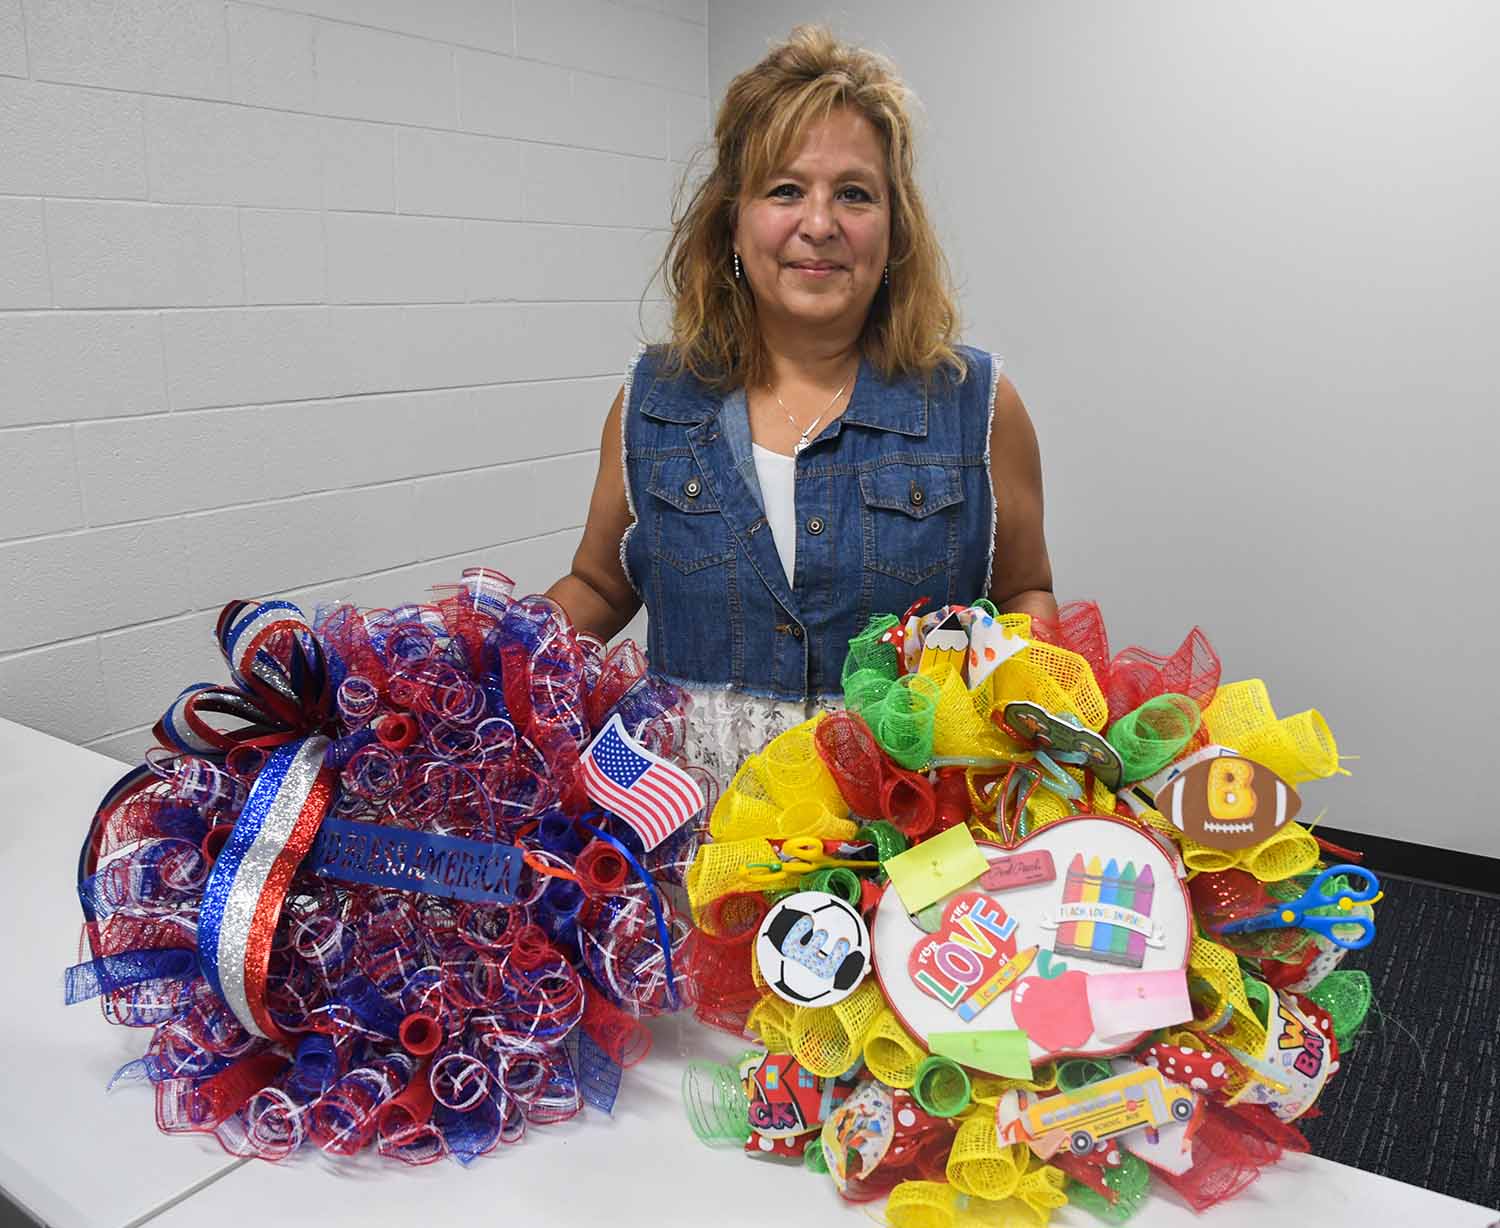
San Jacinto College continuing and professional development instructor Diana Johnson offers classes in both wreath making and bow making for community engagement.
“You don’t need crafting experience to join my course,” said Johnson. “Your most important tool is a positive attitude.”
Whether you're a novice or an experienced DIY enthusiast, follow Johnson’s step-by-step guide to create a wreath that will add a touch of style to your space.
Materials you will need:
- Wired wreath base
- Chenille stems (pipe cleaners)
- Wired and mesh ribbon
- Mesh tubing
- Glue gun
- Glue sticks
- Silicone finger caps
- Rotary cutter or scissors
- Crafting clamps
- Decorative accessories
- Cutting mat
Step 1: Select a theme or color scheme for your wreath. This could be based on a season, holiday, or your personal style. Wired wreath bases are available in many shapes and sizes. For a novice, Johnson suggests starting with a round frame. There’s also no need to break the bank on supplies.
“I buy the majority of my supplies at the Dollar Tree,” said Johnson. “If I can’t find what I need there, I will source items at Hobby Lobby and Michaels.”
Step 2: Lay out your cutting mat, and make sure you have all your tools and materials handy.
“A crucial tool is a table to work on,” said Johnson. “Having proper space for all your materials, and taking your time is important. The process is time consuming but so much fun.”
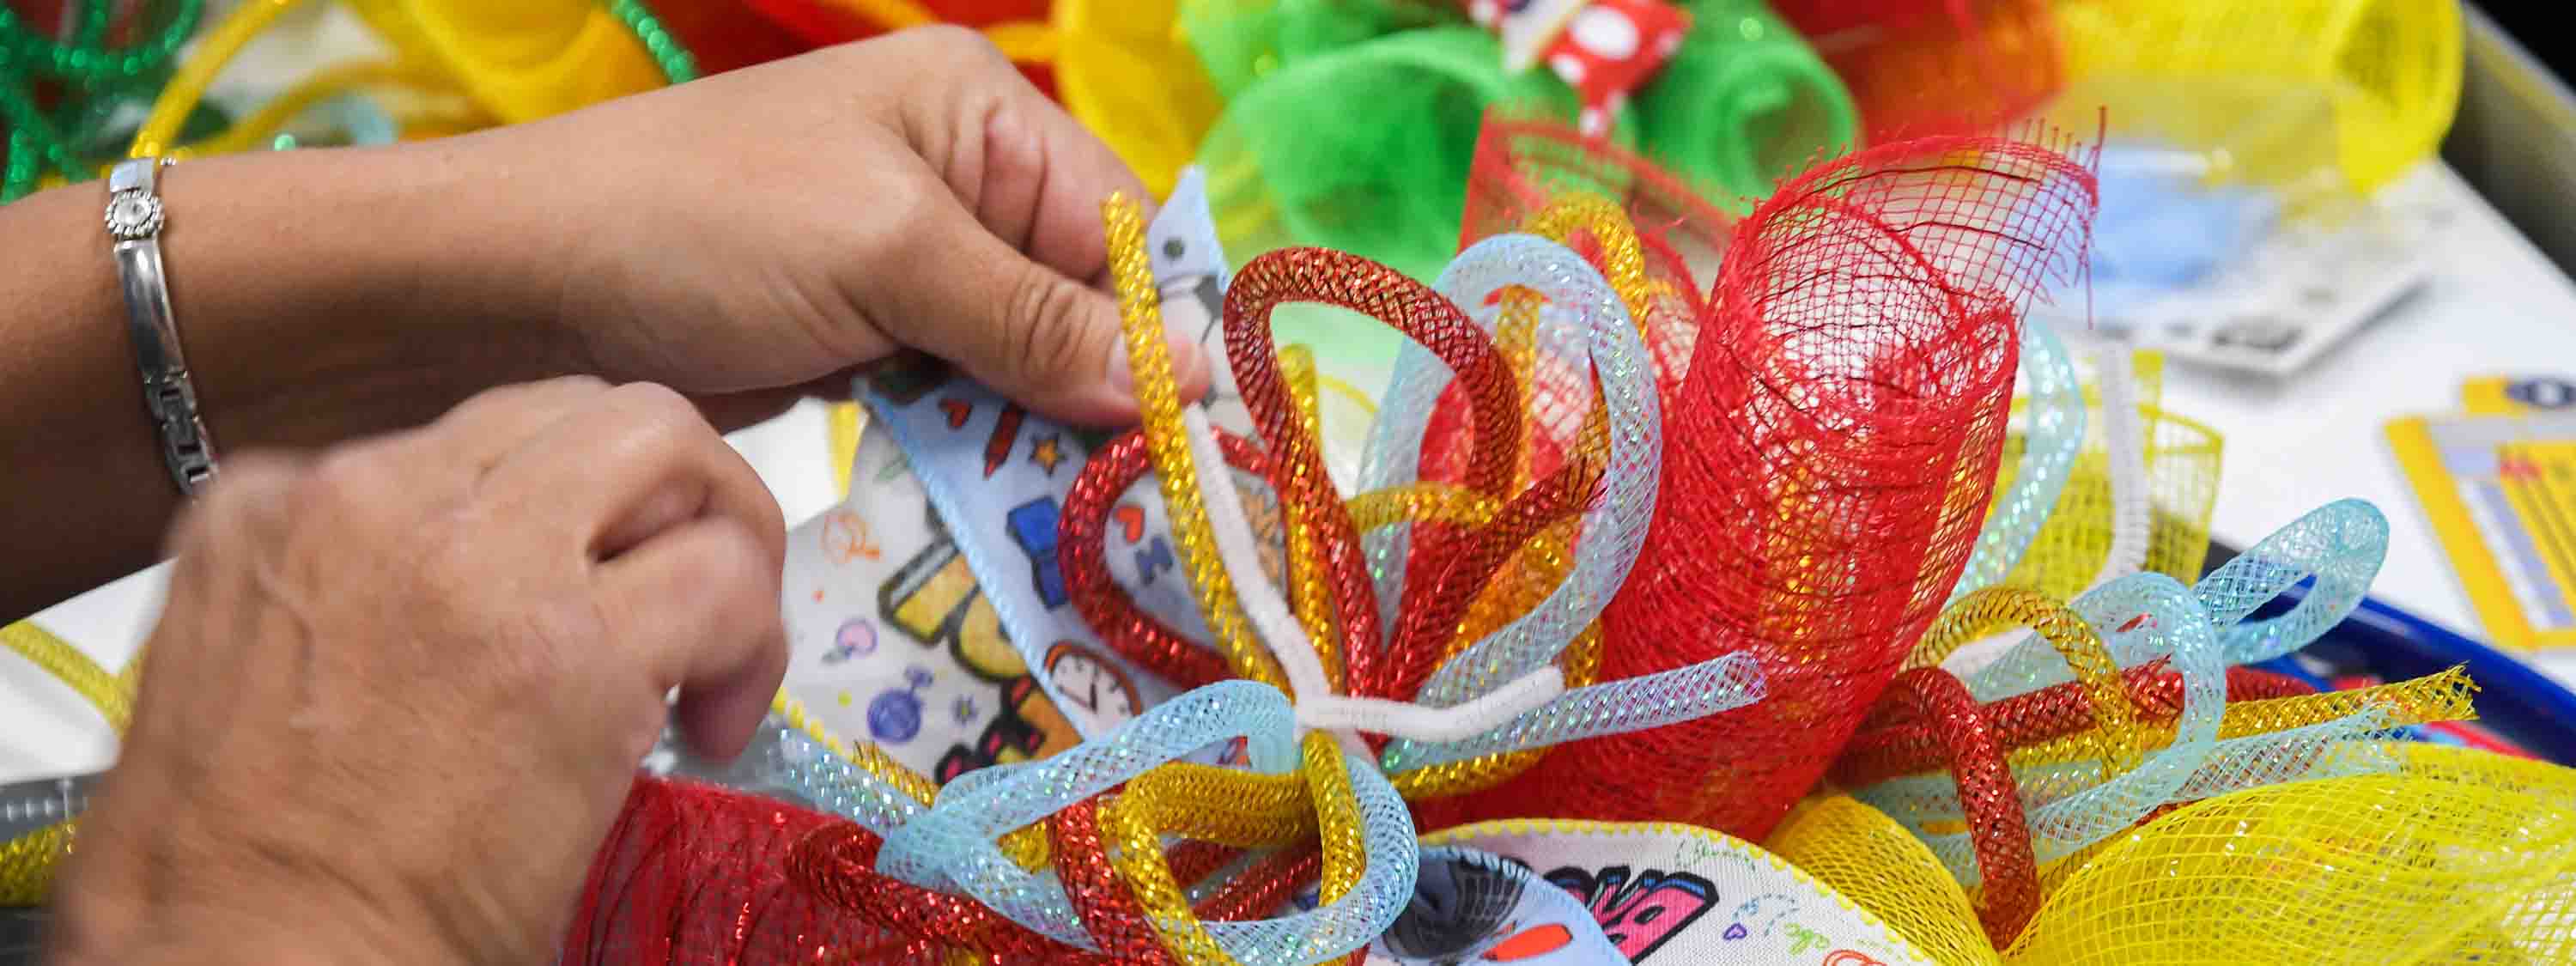
Step 3: Using your cutting mat’s ruler, measure the mesh ribbon to size (about 18 inches long) and cut using the rotary tool or scissors. Once cut, begin rolling one end of the mesh until the raw edge is no longer visible. Use a crafting clamp to hold this rolled side and repeat on the other end.
Once you have your rolled ends, gather the mesh until both sides come together. At this point, you will use a chenille stem to twist tie the center of the mesh, creating a bow. With the remainder of the loose chenille stem, attach the bow to the wired wreath base. Repeat this process three times in each section of the base or until it begins to fill out.
“The longer your mesh is, the fluffier your wreath with be,” said Johnson. “You have flexibility to make your wreath as full as you like. There is no wrong answer when creating a wreath.”
Step 4: Measure the mesh tubing and wired ribbon using your cutting mat. Cut them to the desired length and add them to the top of the mesh ribbon bow. You will attach these items using the remaining chenille stems from the mesh ribbon.
“A fun way to detail your wired ribbon is to dovetail the ends,” said Johnson. “You get a perfect dovetail by folding the ribbon in half lengthwise. Then, cut from the fold at a right angle towards the open end.”
Step 5: Incorporate decorative accessories. Attach other accessories such as pinecones, ornaments, or other elements with hot glue. Johnson recommends using Gorilla Glue brand glue sticks for extra hold, especially for outdoor wreaths.
“One tip I learned the hard way is using silicone finger caps to protect from the hot glue,” said Johnson. “They are available at most craft stores and will save you from those annoying burns.”
Step 6: Apply your final touches. Inspect the wreath for any loose decorations or glue strands. Make any necessary adjustments to ensure everything is secure, then hang and enjoy!
To learn more about Johnson’s classes on wreath and bow making, email amber.buras@sjcd.edu.